Auto Provisioning
Auto Provisioning App helps you set up your IP phones in bulk.
Using auto provisioning, you can instruct phone to retrieve its configuration from Yeastar PBX. Once you provision your phones, the phones will automatically configure themselves correctly. In this way, you can manage your phones centrally without having to configure your phones one by one.
Supported IP Phone Manufactures and Phone Models
Yealink
| Model | Firmware Version |
|---|---|
| SIP-T19P E2 | 53.81.0.XX or later |
| SIP-T21P E2 | 52.81.0.XX or later |
| SIP-T23P | 44.81.0.XX or later |
| SIP-T23G | 44.81.0.XX or later |
| SIP-T27P | 45.81.0.XX or later |
| SIP-T27G | 69.81.0.XX or later |
| SIP-T29G | 46.81.0.XX or later |
| SIP-T40P | 54.81.0.XX or later |
| SIP-T40G | 76.81.0.XX or later |
| SIP-T41P | 36.81.0.XX or later |
| SIP-T41S | 66.81.0.XX or later |
| SIP-T41U | 108.84.0.119 or later |
| SIP-T42G | 29.81.0.XX or later |
| SIP-T42S | 66.81.0.XX or later |
| SIP-T43U | 108.84.0.119 or later |
| SIP-T46G | 28.81.0.XX or later |
| SIP-T46S | 66.81.0.XX or later |
| SIP-T46U | 108.84.0.119 or later |
| SIP-T48G | 35.81.0.XX or later |
| SIP-T48S | 66.81.0.XX or later |
| SIP-T48U | 108.84.0.119 or later |
| SIP-T52S | 70.81.0.XX or later |
| SIP-T53 | 95.84.0.30 or later |
| SIP-T53W | 95.84.0.30 or later |
| SIP-T54W | 96.84.0.30 or later |
| SIP-T57W | 97.84.0.35 or later |
| SIP-T54S | 70.81.0.XX or later |
| SIP-T56A | 58.80.0.XX or later |
| SIP-T58A | 58.80.0.XX or later |
| SIP-T58V | 58.80.0.XX or later |
| W41P | W60B: 77.83.0.10 or later |
| W53P | W60B: 77.83.0.10 or later |
| W60P | W60B: 77.83.0.10 or later |
| W52P | Base for W52P: 25.81.0.30 or later |
| W56P | Base for W56P: 25.81.0.30 or later |
| CP930W-Base | W60B: 77.83.0.20 or later |
| VP59 | 91.283.0.30 or later |
| CP920 | 78.84.0.80 or later |
| CP960 | 73.83.0.30 or later |
Vtech
| Model | Firmware Version |
| ET605 | 8.10.1.31 or later |
| ET635 | 8.10.1.31 or later |
| ET685 | 8.10.1.25 or later |
| VDP650 | 1.0.0.9 or later |
| VCS752 | 1.1.6.0 or later |
| VCS754 | 1.1.6.0 or later |
Fanvil
| Model | Firmware Version |
| C400 | 14.0.0.3.r1 or later |
| C600 | 14.0.0.3.r1 or later |
| X1 | 2.8.0.6251 or later |
| X1P | 2.8.0.6251 or later |
| X2 | 2.8.0.6251 or later |
| X2C | 2.8.0.6251 or later |
| X3S | 2.8.0.6251 or later |
| X3G | 2.8.0.6251 or later |
| X4 | 2.8.0.6251 or later |
| X5G | 1.4.0.2016 or later |
| X5S | 1.8.0 or later |
| X6 | 1.8.0 or later |
| H5 | 2.8.0.6251 or later |
Snom
| Model | Firmware Version |
|---|---|
| D120 | 10.1.42.14 or later |
| D305 | 10.1.42.14 or later |
| D315 | 10.1.33.33 or later |
| D345 | 10.1.33.33 or later |
| D375 | 10.1.42.14 or later |
| D385 | 10.1.33.33 or later |
| D712 | 10.1.42.14 or later |
| D715 | 10.1.42.14 or later |
| D717 | 10.1.42.14 or later |
| D725 | 10.1.42.14 or later |
| D735 | 10.1.42.14 or later |
| D745 | 10.1.42.14 or later |
| D765 | 10.1.42.14 or later |
| D785 | 10.1.33.33 or later |
Preparation for Auto Provision Phones
Important: For the first time to auto provision your phones on the PBX, you need to RESET all your phones before auto provisioning, or auto provisioning may not work.
- Check your phones’ basic information, including phone manufacturer, MAC address, phone model.


In case you have more than 10 phones and you don’t want to key in the information by yourself, you can ask your IP Phone supplier to provide you a list of MAC address and serial numbers, next plan and assign each MAC ID to an extension number by following this sample.
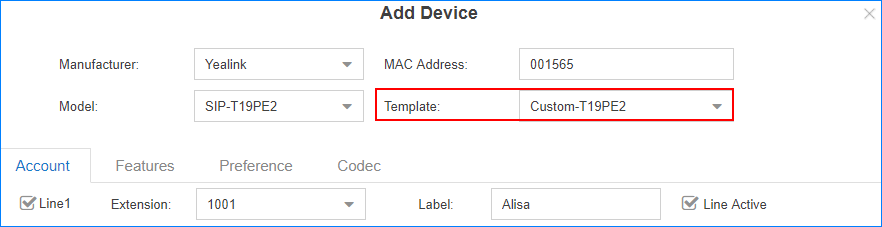
- On the PBX Auto Provisioning page, add devices and set your phones’ manufacturer, MAC address, model.


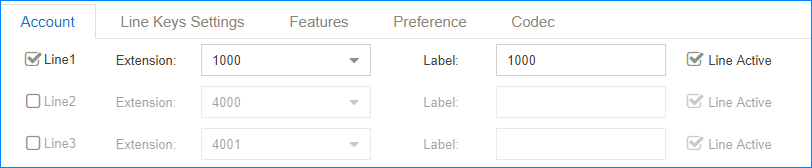
- Set the phone lines.
- Set the phones’ language, time and password. It’s preferable to choose the “Prefix” option for the password in order to eliminate the warning display on IP Phone if the default password is used.

- Optional: Set other phone settings.
- Save the settings and REBOOT your phones.Note: After auto-provisioned successfully, each time when your phones reboot, they will get and apply configurations (phonebook, language, time, etc.) from the PBX.
- When the phones restart, phone users will see an authentication page on their phones. Users need to enter the user name and password to get and apply configurations from the PBX.
You will get this information from the user welcome email, first send the email to the user, next find the information at the bottom of the welcome email.
The user will find in their email:- User Name: The extension number that is assigned to the phone.
- Password: The voicemail access PIN of the extension.
 Now You can auto provision your phones to make the phones register PBX extensions automatically.Important: For the first time to auto provision your phones on the PBX, you need to RESET all your phones before auto provisioning, or auto provisioning may not work.
When the phone starts, the phone user needs to fill in the user name and password to get the configurations from PBX, the user name and password can be found from user welcome email.

User Name: Enter the extension number that is assigned to the phone.
Password: Enter the extension’s Voicemail Access PIN.
* Update on Dec 2020. Yealink has fixed this bug with their latest firmware. (How to upgrade firmware here) You can skip the step described below (Disable only accept trusted certificates) if you have these firmware versions on your IP Phone. (After the firmware upgrade, please do a factory reset again)
- Yealink T3 Series: 124.85.0.15 (Download from here: http://support.yealink.com/documentFront/forwardToDocumentDetailPage?documentId=356)
- http://help.yeastar.com/download/support/T27G-69.85.0.22.rom
- http://help.yeastar.com/download/support/T46S(T48S,T42S,T41S)-66.85.0.22.rom
- http://help.yeastar.com/download/support/T46U(T43U,T46U,T41U,T48U,T42U)-108.85.0.22.rom
- http://help.yeastar.com/download/support/T54W(T57W,T53W,T53)-96.85.0.22.rom
- http://help.yeastar.com/download/support/T58V(T56A)-58.85.0.22.rom
- http://help.yeastar.com/download/support/VP59-91.85.0.22.rom
- http://help.yeastar.com/download/support/CP920-78.85.0.22.rom
- http://help.yeastar.com/download/support/CP960-73.85.0.22.rom
* Update on May 2020. You are required to Disable only accept trusted certificates if you want to use auto-provision.
There are some known issues on Yealink IP Phones related to SSL certification. (Out of our control), you may want to Disable “Only Accept Trusted Certificates”, reboot the phone, and try auto-provision again, steps below:
The first Step, find the IP Address of the phone:
| Phone Model | Instructions for getting the IP Address |
| Yealink T21P Yealink T42S | Press OK on the phone. The IP address should be shown on the first line labeled IPv4. |
| Yealink T46S | 1. Press the Menu icon then select Status. 2. The IP address should be shown on the first line labeled IPv4. |
| Yealink W52P Yealink W56P | 1. Pickup one of the handsets that is registered to the base station, then press OK 2. Press OK on the (i) icon. 3. Press OK on the BASE option. 4.. The IP address of the Base will be displayed on the screen. |
Second Step, use a browser to access this IP address, login with default user name and password:

Third Step: Goto Security => Trusted Certificates, then Disable “Only Accept Trusted Certificates”

That’s all, save and reboot the IP Phone, you will be prompted to enter your username and password now.
For Fanvil IP Phones, the steps are similar, kindly go to Trusted Certificates and set to “All Certificates”:

Update Auto Provision Settings
After finishing the auto provision configurations, you can update auto provision settings for specific phones or all the phones.Note: Only the phone with extension registered to the PBX can update the auto provision settings.
- Go to Auto Provisioning > Device List.
- Select the desired phone(s), click
 to edit the settings.
 - Click Save to save your configurations.
- On the pop-up window, click Yes to reboot the phone(s) and update the configurations.Note: If the phones do not reboot automatically, reboot the phones automatically to make the configuration take effect.
Auto Provision Phonebook
You can upload a phonebook to the PBX, and auto provision the phonebook to all the users’ phones.
Note:
- After auto provisioning phonebooks to the users’ phones, the existing phonebooks on their phones will disappear.
- Auto provisioning phonebook only works for the phones that were registered to the PBX via auto provisioning.
- Go to Auto Provisioning > Phonebook > Phonebook, click Upload Phonebook.
- On the configuration page, select the phone manufacturer, and click Browse to choose an xml file.Note:
- The file name should not contain special characters.
- To make an xml file, contact your phone manufacturer; you can also log in to the phone web interface, export an xml file to start with.
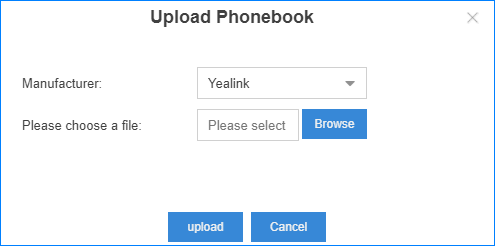
- Click Upload to upload the file to PBX.
- Reboot the phone(s) and update phonebook
Auto Provision Contacts
You can add contacts on the PBX, and auto provision the contacts to the users’ phones.
Note:
- After auto provisioning contacts to the users’ phones, the existing contacts on their phones will disappear.
- Auto provisioning contacts only works for the phones that were registered to the PBX via auto provisioning.
- If you have uploaded a phonebook to the PBX, the PBX will auto provision the contacts in the phonebook, and ignore the contacts that you add in the PBX.
- Go to Auto Provisioning > Phonebook > Contact.
- Click Add to add a contact.
- On the configurations page, set the contact’s information.
- Click Save.
- Reboot the phone(s) and update contacts.
Auto Provision Phone Firmware
You can update the phone firmware by Auto Provision method.Note: Auto provisioning phone firmware only works for the phones that were registered to the PBX via auto provisioning.
- Go to Auto Provisioning > Firmware Upgrade, the page displays the auto-provisioned phone models.
- Click Check for New Version.
- Click the Upgrade To drop-down menu, check if the phones have a new firmware version available. If the phone has a new firmware version, you can see the version in the drop-down menu.
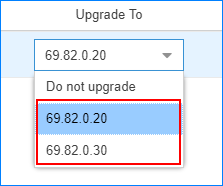
- Select a firmware version that you want to upgrade to.
- Reboot the phone(s) and update the firmware.
Synchronize Phone Time with the PBX
You can synchronize the users’ phone time with the PBX via Auto Provisioning function. You can also manually set the phone’s NTP server as your PBX’s time; the phone time will be synchronized to your PBX.Note: Only the phone that were registered to the PBX via auto provisioning can auto provision the phone time.
- Go to Auto Provisioning > Device List, select the desired phone(s) and edit.
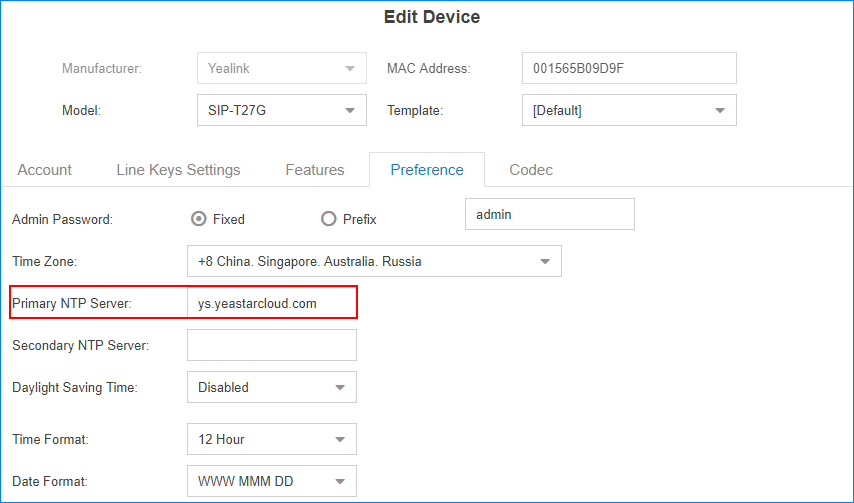
- On the configuration page, click Preferences tab.
- Set the Primary NTP Server as the domain of your PBX.
- Click Save.The following dialog box appears.
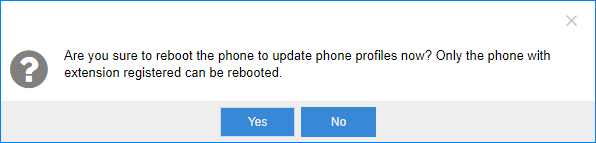
- Click Yes to reboot the phone(s) and synchronize the phone time with the PBX.
Export Auto Provision Settings
After finish the auto provision configurations, you can export the auto provisioning settings to a CSV file.The CSV file contains phone manufacturer, phone model, phone MAC address, assigned extension number, voicemail access PIN for extension.
- Go to Auto Provisioning > Device List.
- Select desired phones, click Export.

Auto Provisioning Template
Search and View Default Template
Yeastar Cloud PBX has default auto provisioning templates for each phone model. You can search and view the default template for your phones.
- Go to Auto Provisioning > Template > Default Template.
- Select the manufacturer and phone model, click Search.
- Click
 to view the default templates.
- To search contents in the default template, press Ctrl + F on your keyboard.
- In the search field, enter the search criteria.The matched contents will be highlighted.
Add a Custom Auto Provisioning Template
You can configure a customized auto provisioning template and apply it to your phones. In the customized auto provisioning template, you can set global settings for your phones.For example, if all your phones use Chinese user interface, you can set the Language as Chinese in the template.
- Go to Auto Provisioning > Template > Custom Template, click Add.
- Set a name for the template.
- Set the template settings according to your needs.
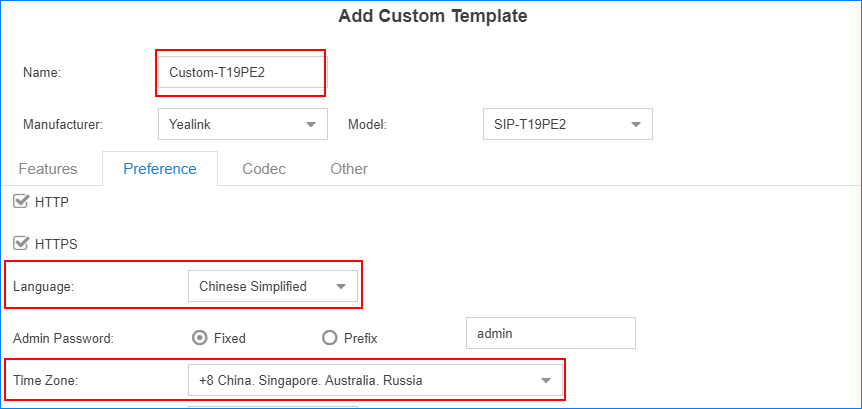
- Click Save.
When you are configuring auto provisioning devices, you can select the customized template.
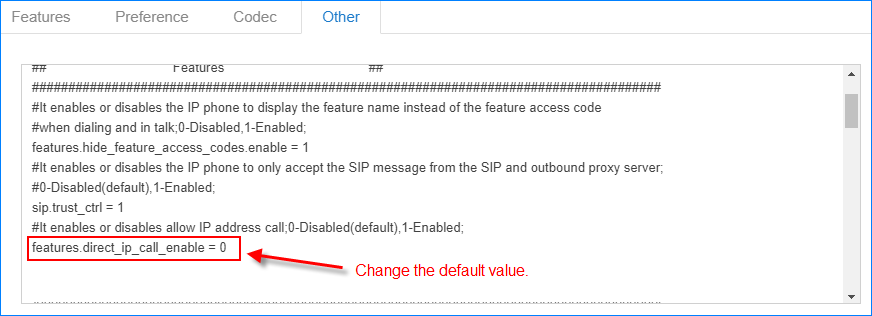
Add Additional Settings in Custom Template
Search your desired setting in the default templates, if the desired setting is not included in the default template, you can add a relevant sentence or change the default value in your custom template.Note: The values you will add in the template should be supported by the phone manufacturer.
- Go to Auto Provisioning > Template > Custom Template, add a template or edit a template.
- On the configuration page, click Other tab.
- Enter your desired sentence(s).
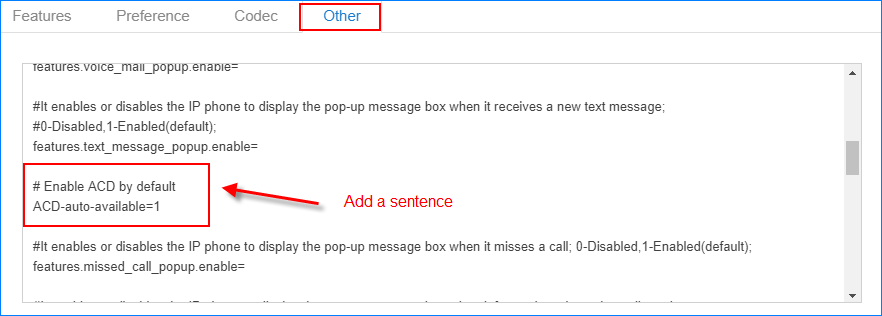
- You can also change the default value in the customized template.
- Click Save and Apply.